# Tips for "Drawing on the Right Side of the Brain"
*last updated: 2026-03-12*
*[video](https://youtu.be/av7S6tB_zKY)*
---
I am reading through *Drawing on the Right Side of the Brain* by Betty Edwards and rather enjoying it. The book focuses on teaching the basics of "seeing" as an artist, which I find quite helpful. Other sources with advice on drawing seem to neglect this. Or more likely, the writers are themselves artists, and they might not even think about the fundamentals or recognize that some people have a deficiency in that area. This book, on the other hand, is meant to take people from a 10-year-old level skill set and bring them up tremendously.
I am six chapters in and while it has been very good so far, I felt that some explanation for the required tools is needed. In one of the opening chapters, Edwards presents a list of materials that will be needed for the class (feels just like being back in grade school!). Most of these are pretty straightforward, but the picture plane and viewfinder need more clarification, in my opinion.
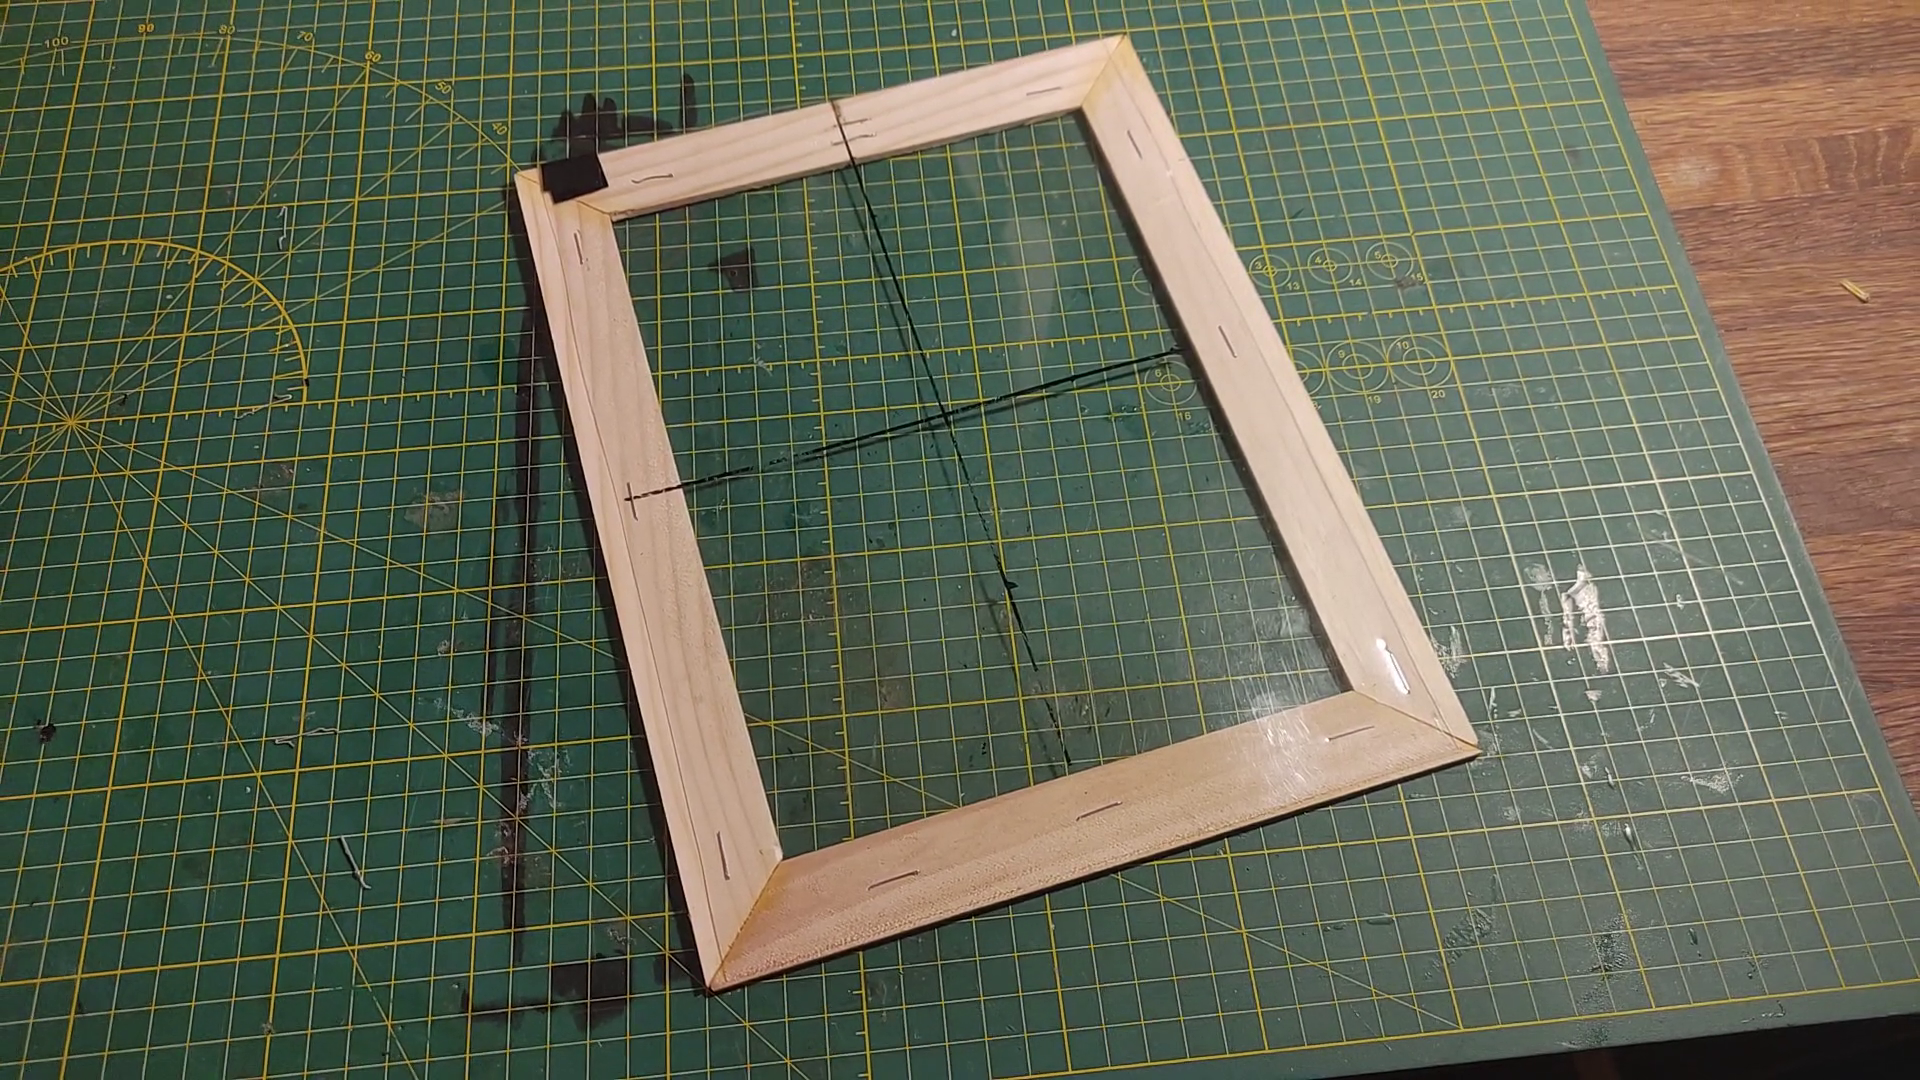
First, the picture plane. This is a tool to assist in transferring a view of the 3D world onto a 2D piece of paper. In the instructions towards the beginning of the book, Edwards writes that this can be made with a thin sheet of transparent plastic or glass with the sharp edges taped off. Originally I opted for the thin plastic but what I found was that it was a little too floppy to be useful. I solved this issue by taking a few paint stirring sticks cut at 45 degree miters, gluing them together, and stapling the sheet to the frame. That has made the plane much more rigid so it can be balanced on the hand, as is required later on.
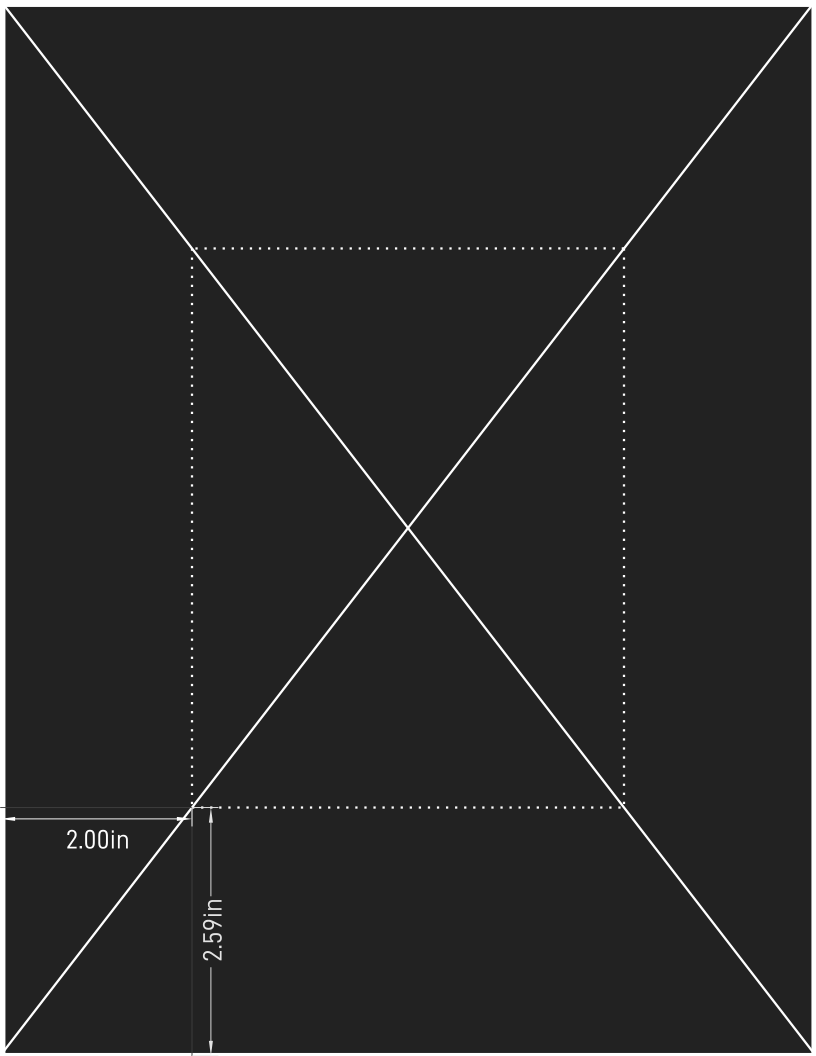
The viewfinder is essentially a paper frame used to define the borders of the drawing. This is made by taking a letter-sized sheet of black card stock, or similar, and cutting a proportional sized rectangular hole in the center. The book gives steps to draw two diagonal lines from corner to corner, then measure in from all four edges to the border width (1" or 2"). Then cut the horizontal and vertical lines to where they intercept. However, the orthogonal lines don’t intersect at the diagonal lines, because the sheet is not square. What you should do instead is draw the diagonals, then measure in from either the long or short edges. Then on the remaining two edges draw a line connecting the points where the orthogonal and diagonals intersect. The end result of this is that two edges of the border will be the measured width (again, 1" or 2") and the other edge will be slightly more or less than that. That is fine, though, because the end result is that cutout in the center is proportional to the overall sheet of paper.
I'll conclude on a quick note about graphite hardness scales. The harder the graphite, the lighter it will mark on the page. For the material to prep, you are requested to get a #4 pencil. The "number" system is what is used in the United States. A #4 pencil is harder than a #3 which is harder than a #2.
Most art stores are going to market pencils and graphite sticks on the "HB" scale, which is another scale of hardness. "HB" is right down the middle, "2B" would be softer, "6B" is even softer and so on. On the other side of the scale, "6H" would be harder than "2H". The American #2 pencil is about equal to "HB" and a #4 would be about 2H. Different manufacturers have different compositions so there will be slight variances.